Consider these designer tricks to work around cabinets, windows and other features for a finished look in your kitchen
 Michelle Ann Designs
Of course, in reality it isn’t always an option to cover every inch of wall in a coveted stone. Even in this luxe kitchen by Abruzzo Kitchen & Bath, someone had to decide: Where should the finish end on the range wall? Above the range hood? Below it? In your project, the decisions can be simple or quite complicated, depending on multiple factors.
 Spectra Design Build
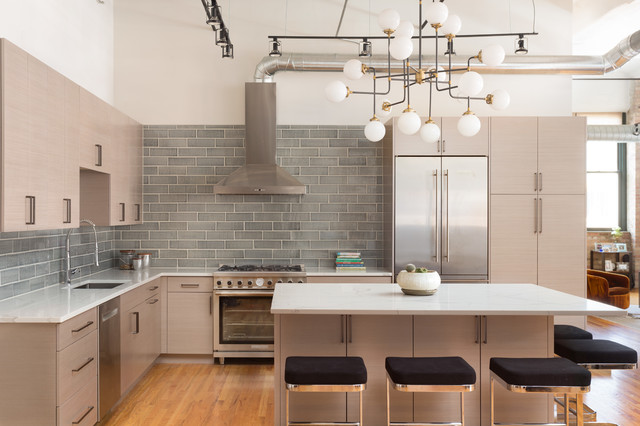
General Rule No. 1: Tile the Cabinet Walls
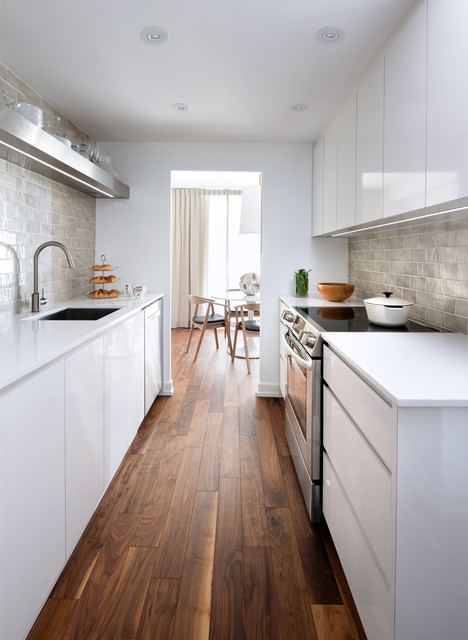
Opinions differ on this, but for a polished look I typically tile just the main walls of the kitchen (those that back the cabinets), ending at the corners rather than wrapping around to finish the sides, if there are any. In the case of an odd corner (like on the left in this kitchen by Spectra Design Build, where there is likely a pipe in the wall), consider the whole corner part of the “back.”
 Toronto Interior Design Group
In some cases, a “sidesplash” on a noncabinet wall can be functional and beautiful, but skipping it is the simplest way to avoid situations where elements don’t line up neatly. Typically, the counter, upper cabinets and wall all end at different places on the sides, leaving no definitive stopping point.
In this example, the tile ends at the corners instead of wrapping onto the small wall with the doorway. If it did wrap onto that wall, the two sides of the door would be hard to balance and likely a bit awkward.
 Studio Geiger Architecture
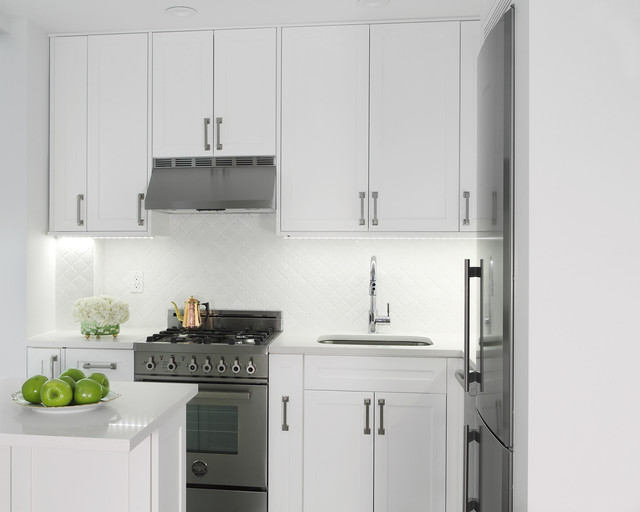
Small kitchens. Fully covering the wall usually is your best bet in a small kitchen (or in a larger kitchen that has just a small area for the backsplash).
This sort of layout, with just a single backsplash area between the fridge cabinet and the side wall, is common in galley kitchens in apartments and condominiums. Tiling the entire area in one material makes for the tidiest finish, which can help make the kitchen look its biggest.
 Avenue Builders, LLC
Big kitchens. In the case of a very large kitchen, or one with dramatically tall ceilings, taking tile to full height can bust the budget or completely overload the look. In a case like this, ending the tile vertically at the same line as the upper cabinets gives a better finish.
If you use a darker color for the tiles than the remaining upper wall, it can visually help bring down the apparent ceiling line and make the room feel a little more intimate.
 KBG Design
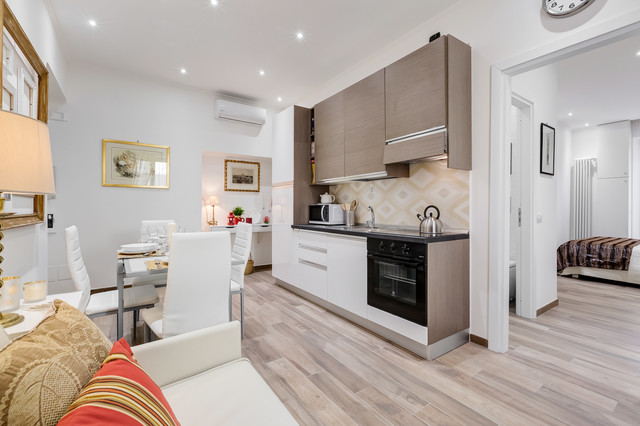 Luca Tranquilli Photographer
General Rule No. 2: Align Upper Cabinets, Lower Cabinets and Backsplash Edges
Knowing where to stop the tile horizontally is easy if your kitchen runs wall to wall, but what if it ends partway along a longer wall? In a case like this, where the kitchen cabinetry ends midroom, the best option is to end the upper cabinets, lower cabinets and backsplash all in one crisp line.
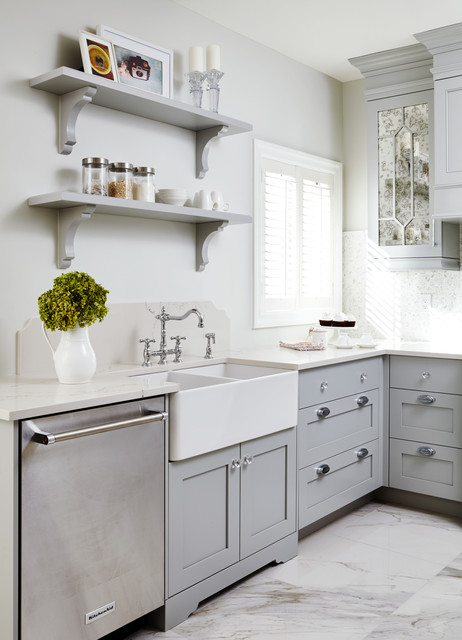
 Cabri inc
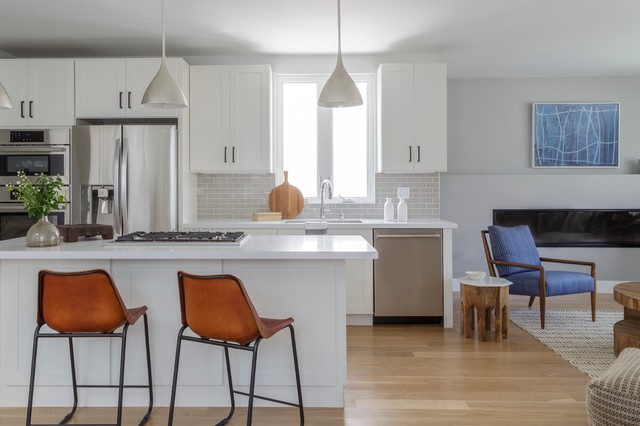 Hearth Design
Of course, this requires the upper and lower cabinets to align crisply, which can take careful planning when laying out the kitchen. Using filler panels and adjusting the spacing around a window can help make cabinets end at the same place on the top and bottom, even if the widths of each cabinet don’t match perfectly above and below.
 Modern Staging | Spaces
Other Tiling Considerations
Peninsulas. What about times when the upper and lower cabinets don’t align? A common place for this to occur is in U- or L-shaped kitchens where the uppers end over a peninsula. In this case, I would suggest ending the backsplash in line with the uppers, so you still get a crisp vertical line.
 Jill Cordner Interior Design
Windows. Sometimes there will be very small areas of wall between windows and a counter or cabinet. It may be tempting to leave these areas empty (and often easier on the tile installer), but the overall effect will be subtly tidier if you imagine the window does not exist when planning where to end the tile.
In this space by Jill Cordner Interior Design, the tile continues to the end of the counter, as ending at the upper cabinet would be far too early.
 sagemodern
In this kitchen by Sagemodern, the tile continues all the way to the corner and up to the height of the upper shelves so that from a distance the line of the upper cabinets is unbroken. It’s a subtle difference versus simply ending at the window, but these little details can make a kitchen feel much more finished.
 Spiral Cellars
 Square Footage Inc.
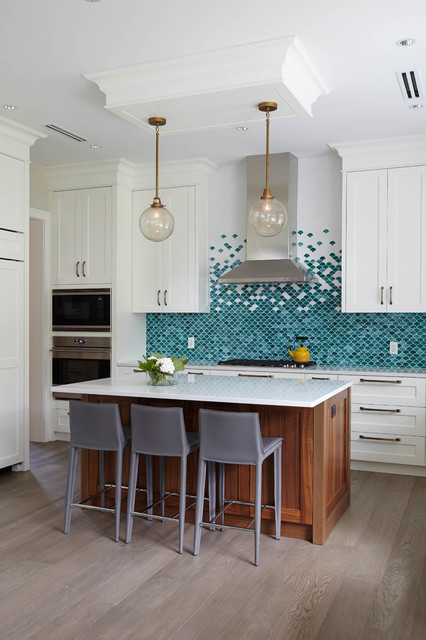 Dakota Homes
Edgy tiles. If you have an interesting tile shape, such as a playful hexagon, you can consider ending the tile with a messy edge to give a more relaxed appeal.
This can apply to the horizontal ends and the verticals. This tile fades slowly to white vertically so that the vibrant blue doesn’t have to carry all the way to the ceiling, and it makes for a unique feature.
 JFKDESiGN landscape | buildings | interiors
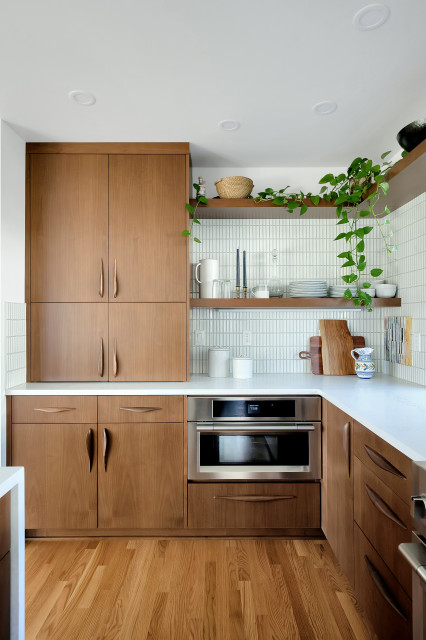 Molly J Littlejohn Design
 The Design Studio
In more traditional kitchens, sometimes the tile will run even a little above the bottom of the cabinets, which gives a pleasing overlap that feels more relaxed and reduces the need to cut tiles into tiny slivers.
 Toronto Interior Design Group
 Staple Design
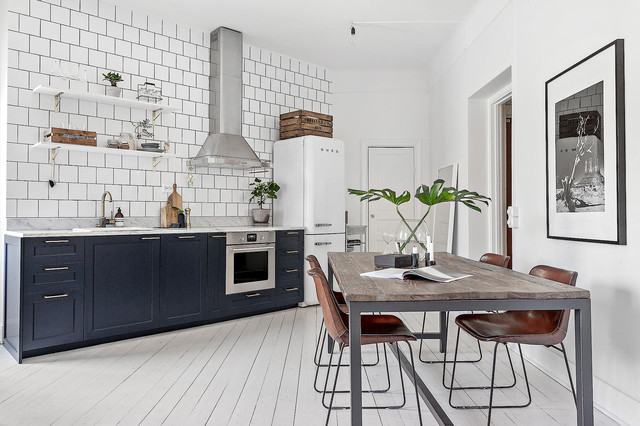 Deco STHLM
One Last (Cost-Saving) Idea
Keep in mind, a full-height backsplash may not be as budget-busting or as visually overwhelming as you would think. A classic porcelain tile, with an optional contrast grout, can give a sophisticated, classic look for just a few dollars per square foot, meaning it can actually be a more luxe-looking option than a higher-end material used in a conservative dose.
 Molly J Littlejohn Design